- Thread starter
- #41
Exactly! For a lot less moneyEssentially you built your own little ezcloner, this is about the same principle they use
") .
.How To Use Progressive Web App aka PWA On 420 Magazine Forum
Note: This feature may not be available in some browsers.
Exactly! For a lot less moneyEssentially you built your own little ezcloner, this is about the same principle they use
.I came across my 16 site ezcloner on Facebook marketplace dirt cheap and when I met up with the guy he even gave me a bottle of cloning solution, couldn’t go wrong, and was mind blown when I saw what they cost new, does an amazing job though and hell yeahh on the cheap part, my buddy built his own using a good size pump, big distribution bar with like 50 sprayers or something like that, in a good size tote soo it holds a crap ton of clones and he built it for less than $80Exactly! For a lot less money
Post up a tutorial and drop a link here Camaro!Can do some cool things splitting them with a clean razor blade if your careful
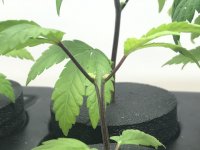
Ended up with 2 tall stalks with big colas on each, wasn’t anything special but was a cool experiment non the lessWhat do you end up with? Besides two stems! Does each side begin producing two nodes each?
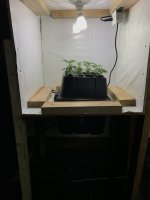
.Ehh, it’s honestly not too much work just a little planning depending what’s available to you. I grow with undercurrent systems as the one I last built has been the most efficient of any system I’ve grown with in the past. I have a 8 site flower room, and my cloner box, I need to build a mother room and a veg room soo I can keep a revolving crop going but for now when I go to change out nutes I have (2) 20 gallon totes stacked on top of each other with a hole cut thru the top one with a pvc pipe glued in to a set height and I fill the bottom tote 3/4 full then fill the top tote till it spills over the pvc pipe draining to the bottom tote, there’s a inline pump sitting on the floor next to them that pumps the water from the bottom tote to the top to keep the water circulating for 3 reasons, I don’t need a air pump to keep algae from growing, it warms the water a little before dumping into the undercurrent system as to not shock the plants, and it mixes the nutes while I let my probe sit in the tote and adjust to my liking, I fill the change out totes a day or 2 before change out, and both upper and lower tote have a drain line on the bottom going to the pump soo I can get all the water out without having to pick them up and dump them out. The undercurrent system has its own pump soo I put a garden hose spigot for draining the system out, and the change out tote then pumps the new nutrients into the undercurrent, or I can pump it into the same place I dump old nutrients if the water goes bad for whatever reason or I’m just cleaning the totes and my cloner drain line also goes to the change out pump for dumping the water. There’s lots of valves to play with to move the water different places, but a person gets tired of carrying totes of water after a while when it’s every 10 days you gotta dump 40 gallons then fill 40 gallons is tiresome quickly LOL... the pumps are a huge plus to everything, making it automated would be a dreamHigh tech! I'm no where near that level
Oh boy! Parts are going to be coming in soon. Looks like 1/2 inch pvc. Any advice on getting the micro sprayers in right? They look like they have a funky thread on them. Maybe for soft plastic. The ones I looked at anyhooHow to build my cloninator aeroponic cloning bucket! This is the original but I've made a few modifications since then. I'll put those at the end in case you'd like to try them.
I started with a 2 gallon bucket and lid from Home Depot. I got this pump from Amazon: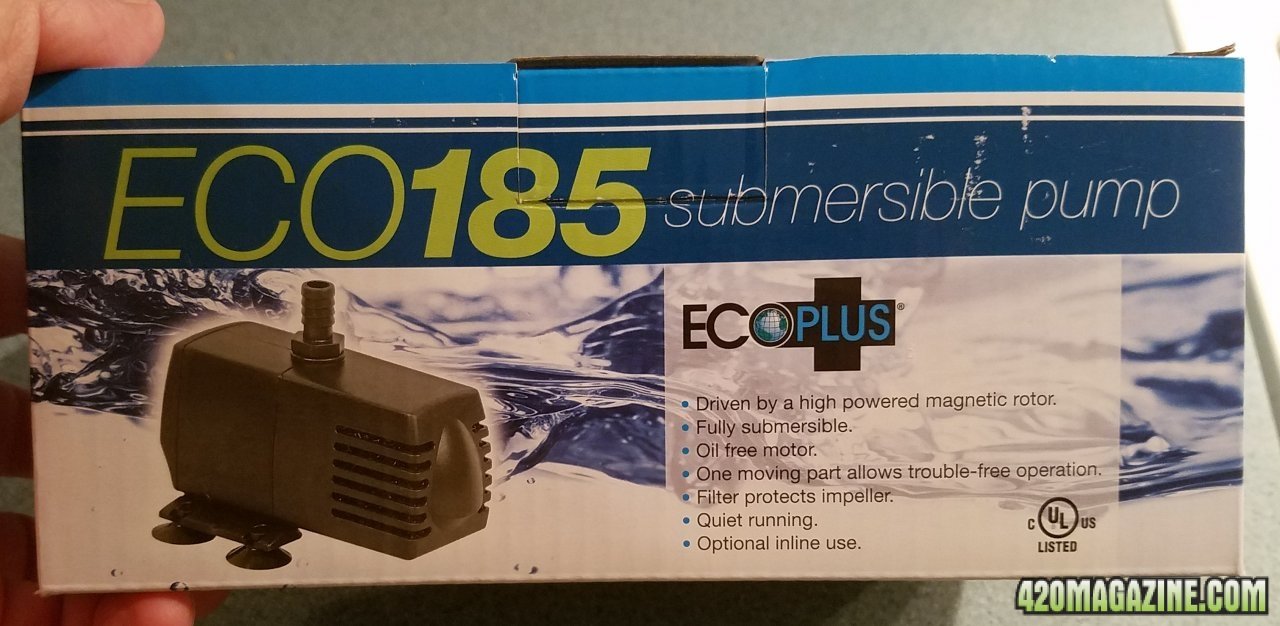
Which came with these adapters: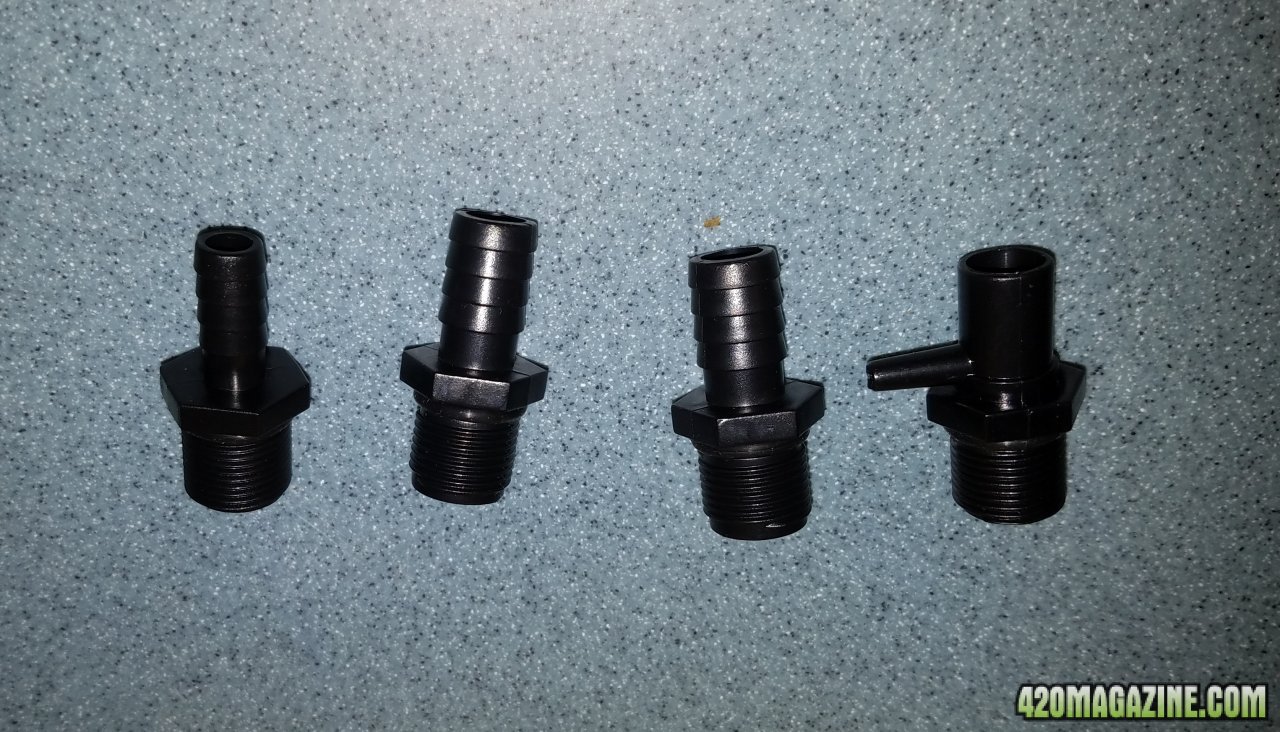
None of which will connect to the sprinkler head, so I had to buy these in brass at Home Depot because they don't carry PVC smaller than ½: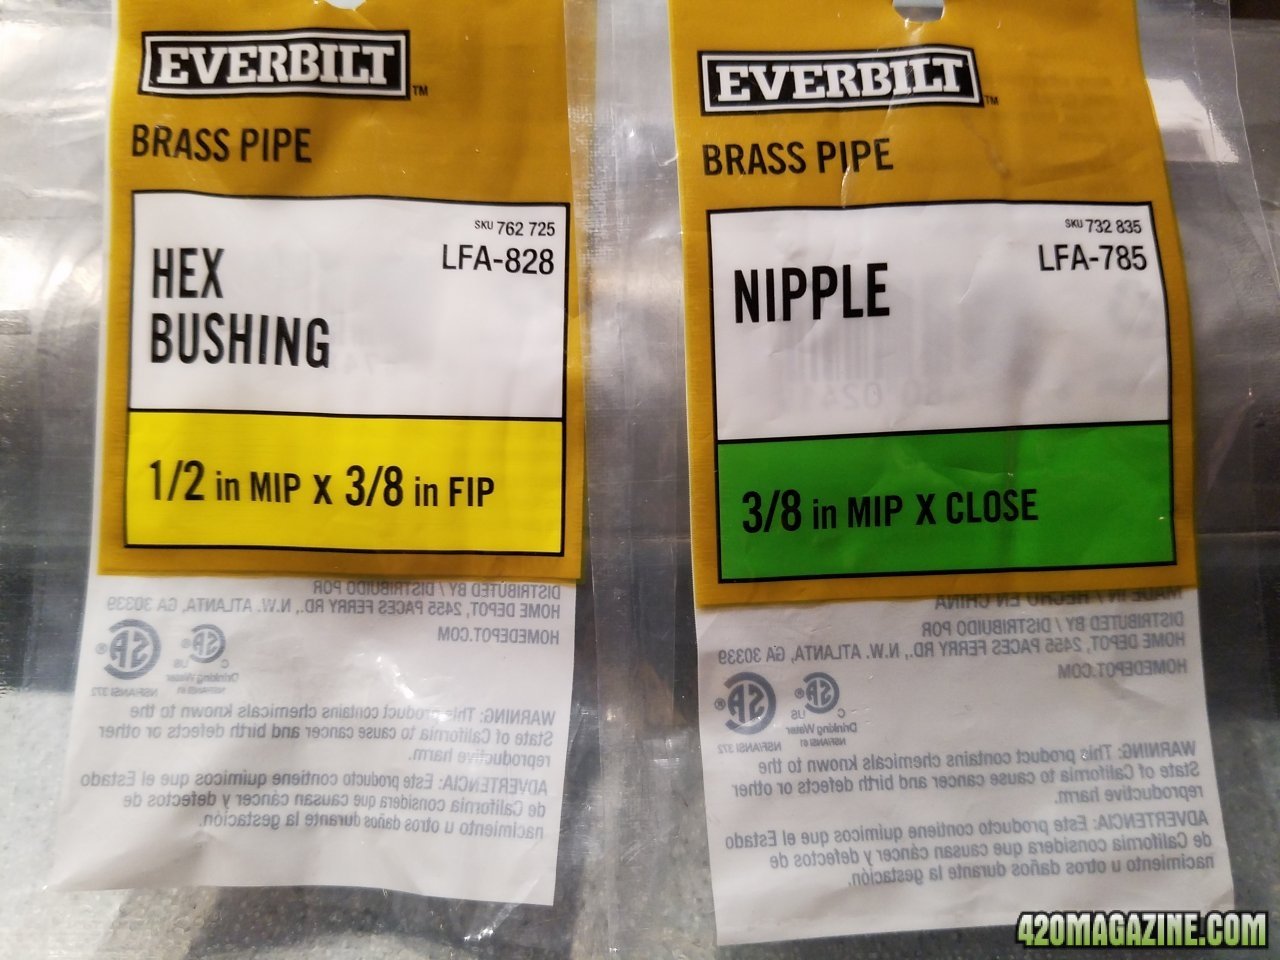
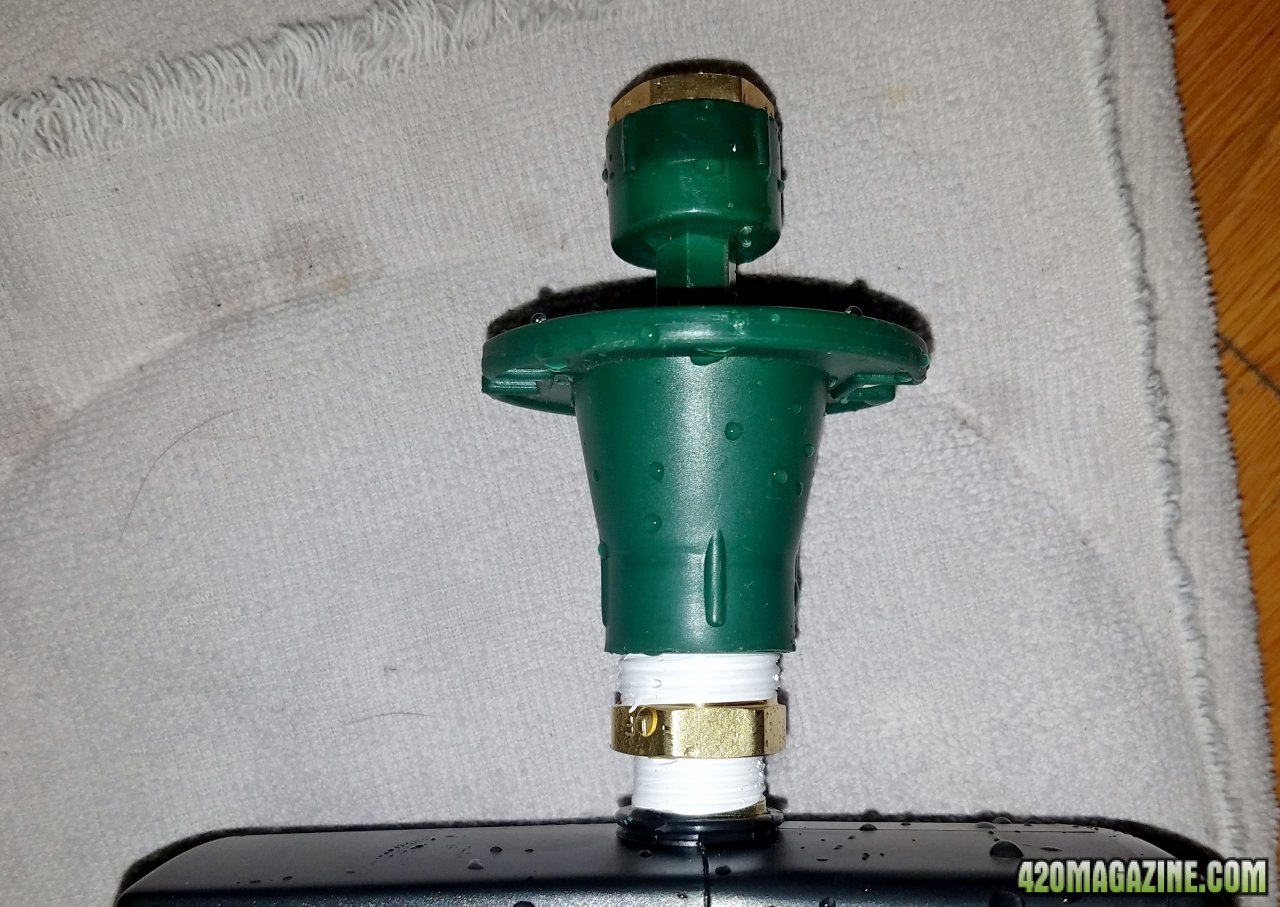
So when it was connected it looked like this:
Next I centered the pump in the bucket:

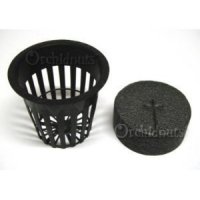
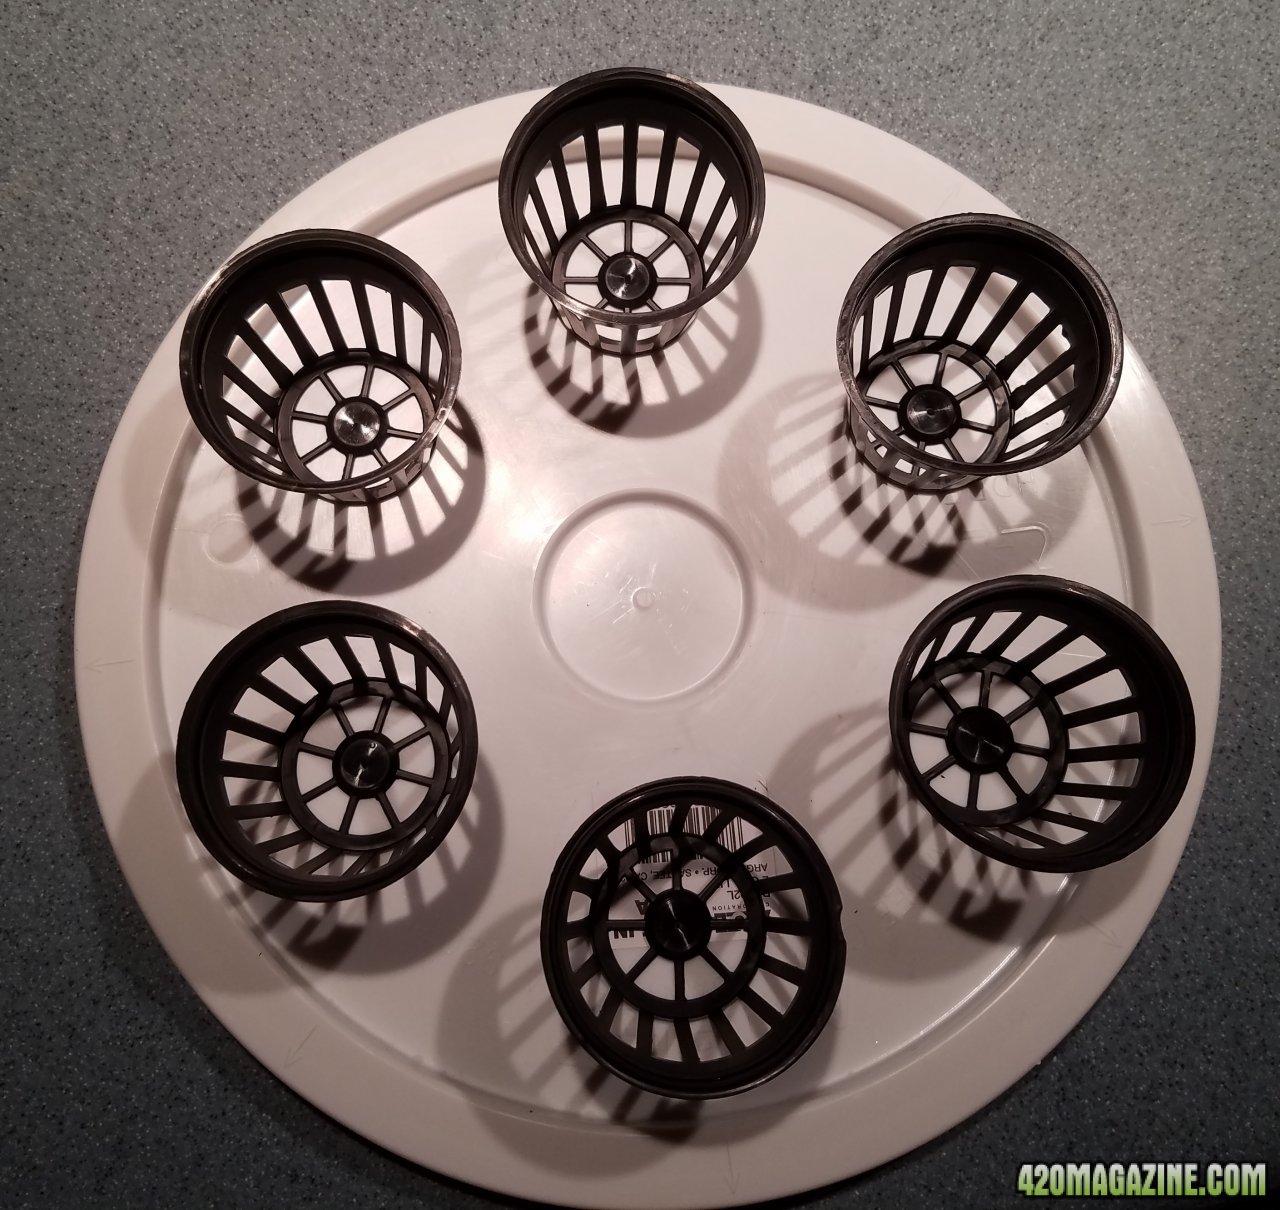
And laid out the 2" baskets from Amazon (they came with the inserts):
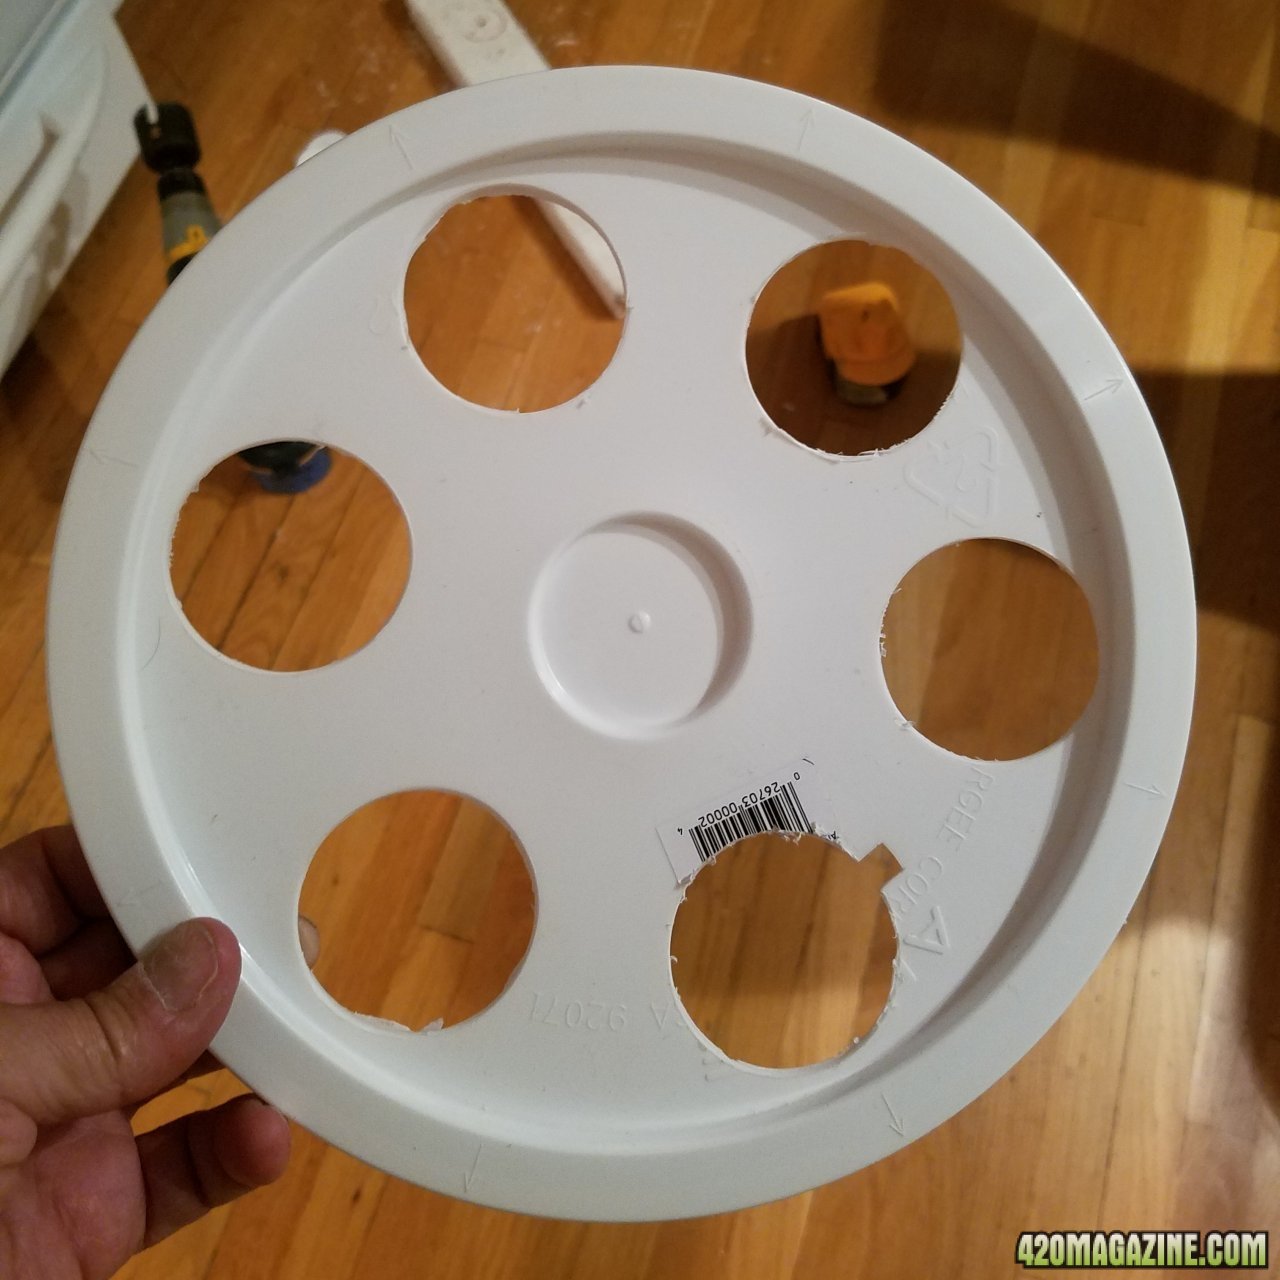
Hole drilling was next. Here is a tip I got from youtube...after you drill the center pilot hole, run the hole saw backward and it makes a much cleaner cut. Here are the cuts and a notch for the wire:
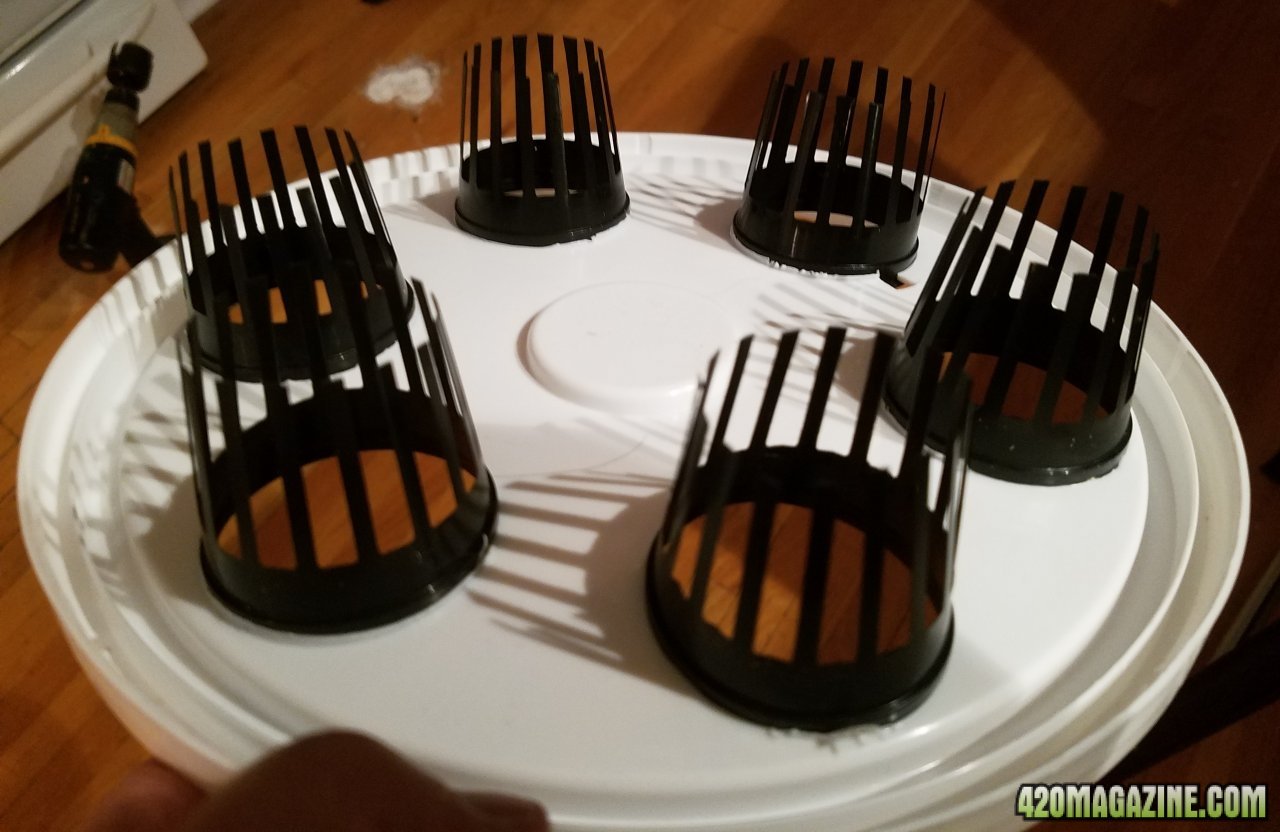
Baskets inserted with the bottoms cut off. It should keep the roots from getting tangled:
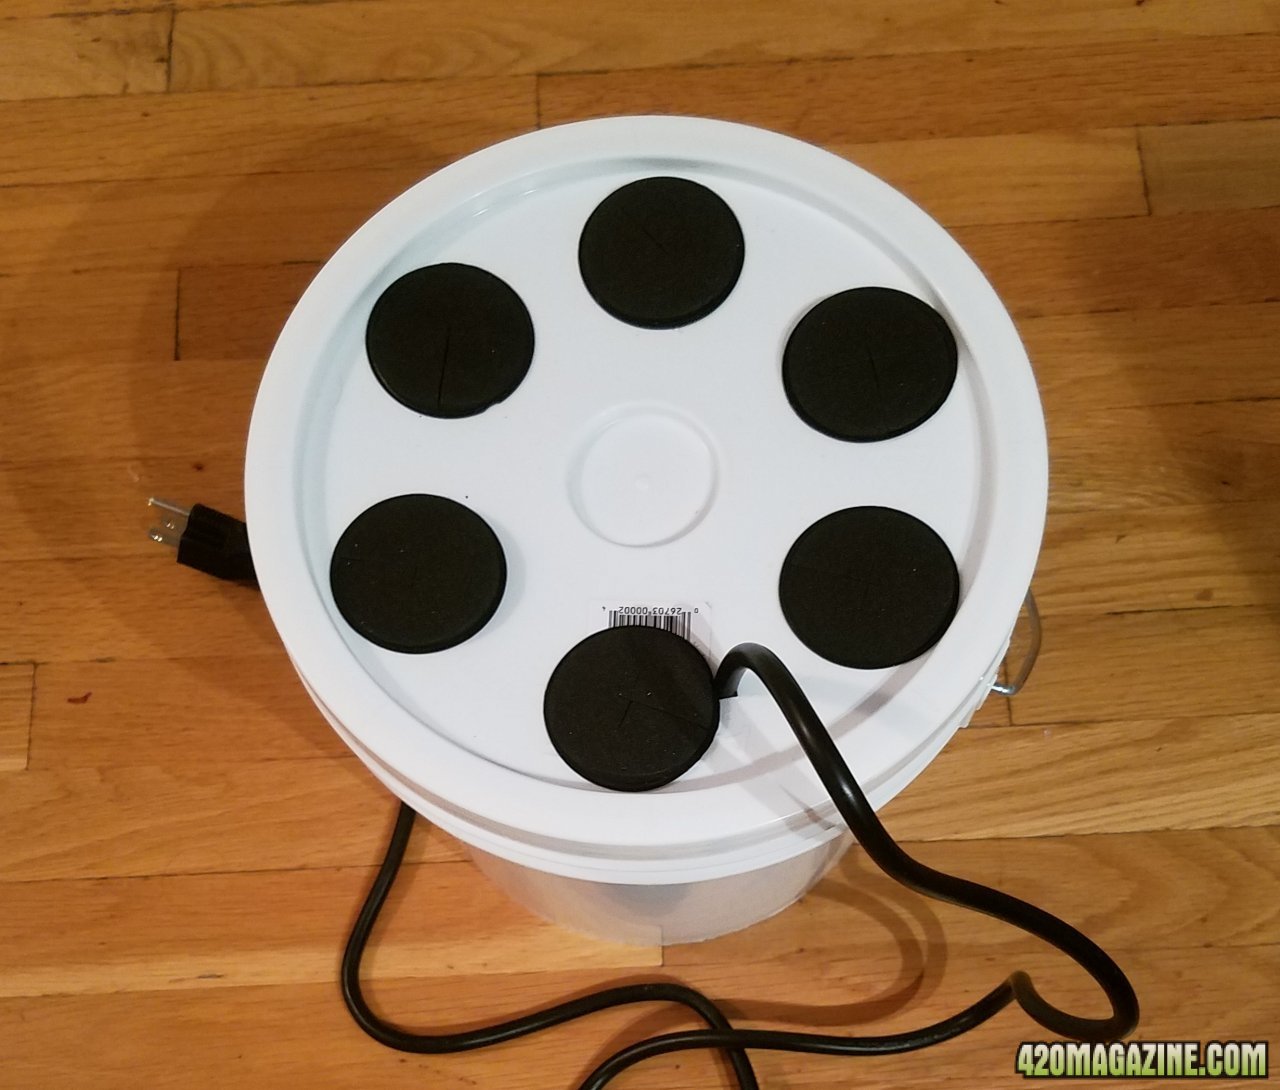
Finished bucket with the neoprene inserts:
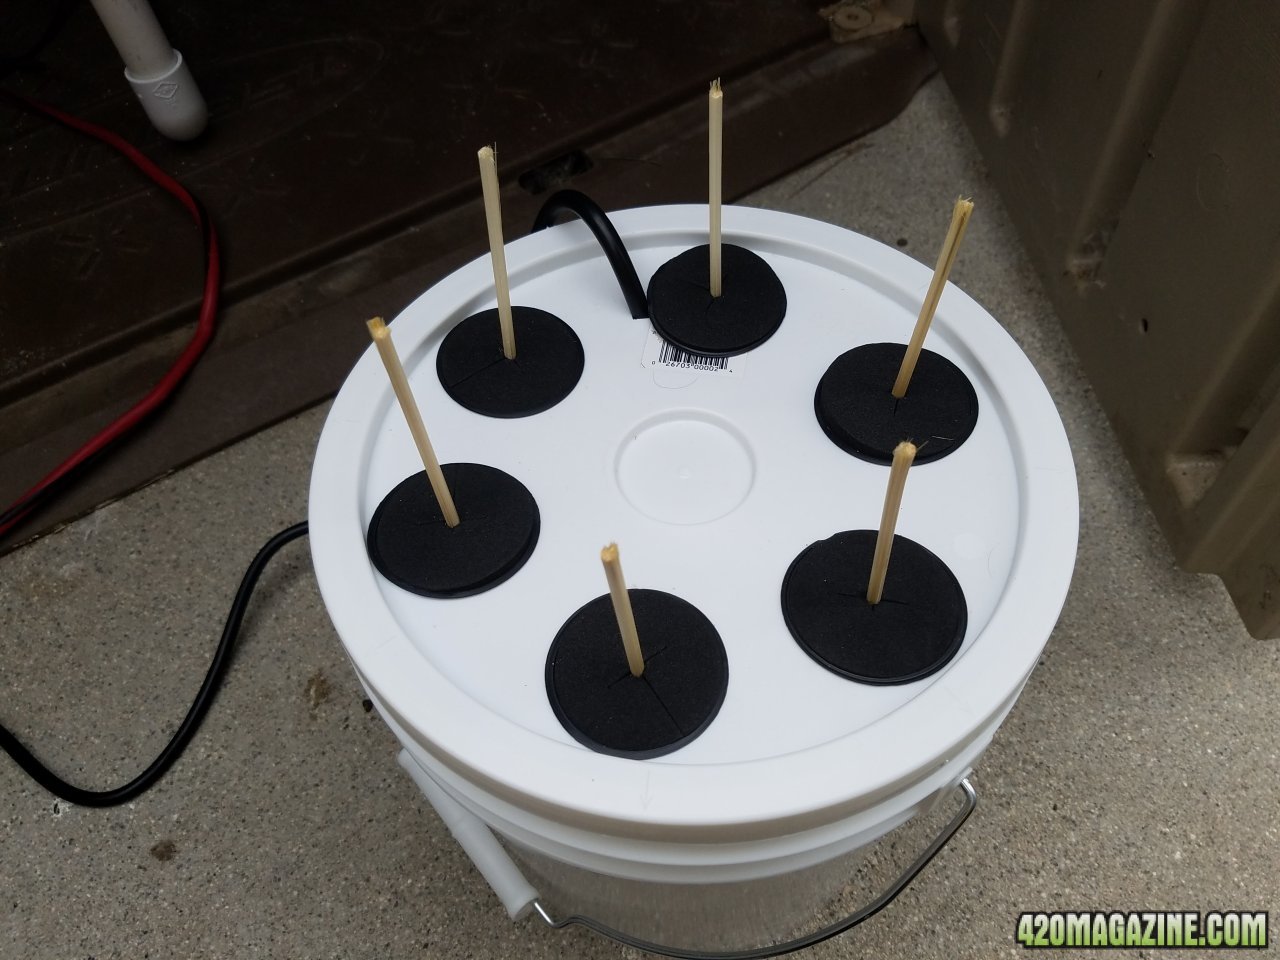
I used barbecue skewers to test the spray:
Maximum wetness! I filled the bucket about ¼ full (so around 64 ounces) and added 4 ounce H2O2 since I don't want to buy any z7 etc:
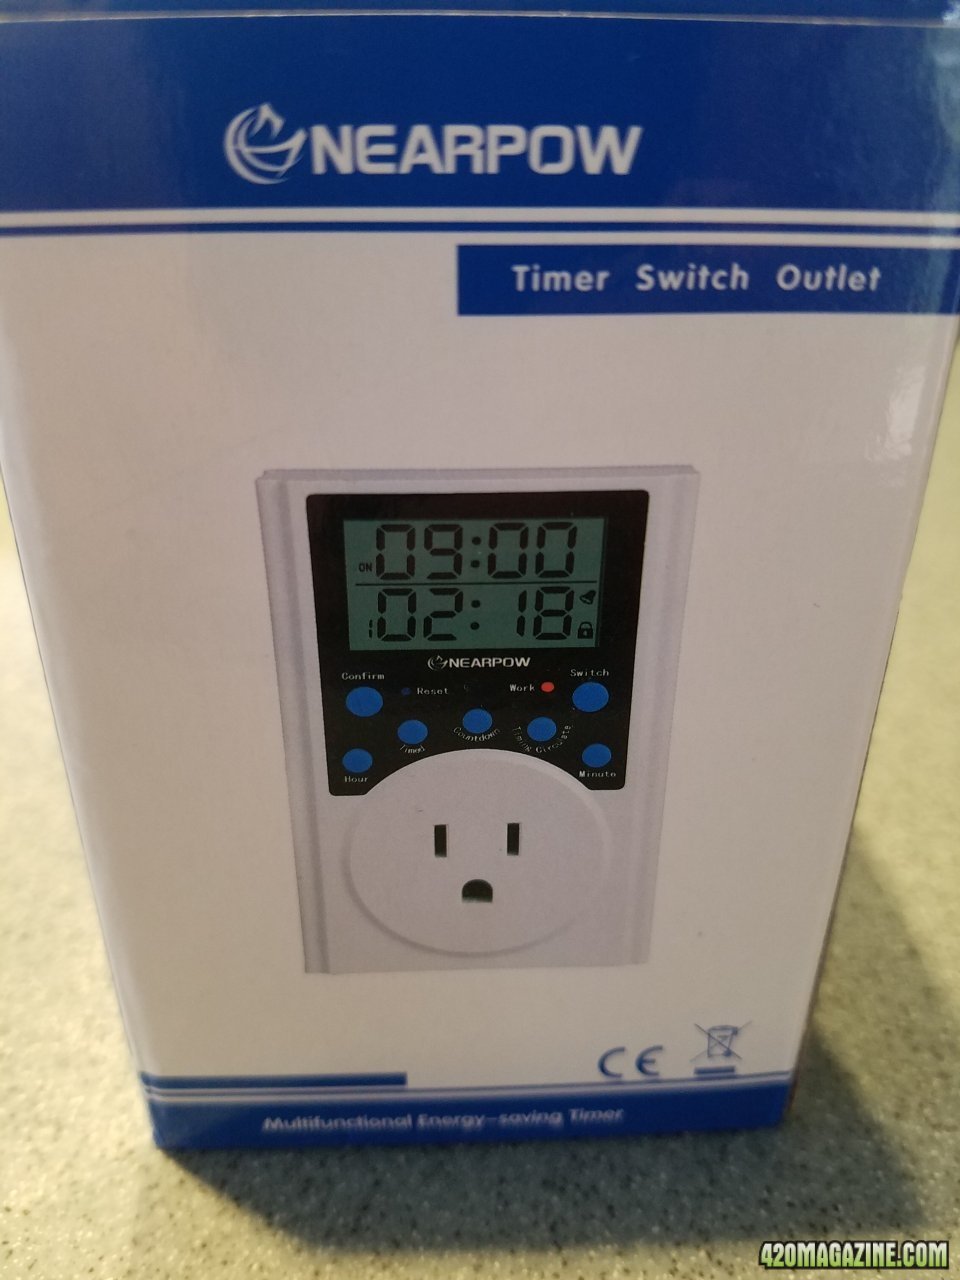
I needed a timer that would do short intervals, so I got this one and set it for 1 minute on / 15 minutes off. I may make that interval longer after a couple of days. Setting the timer was a lot easier than some of the reviews mentioned on Amazon:
I hung a single 23w 6500K CFL over the bucket: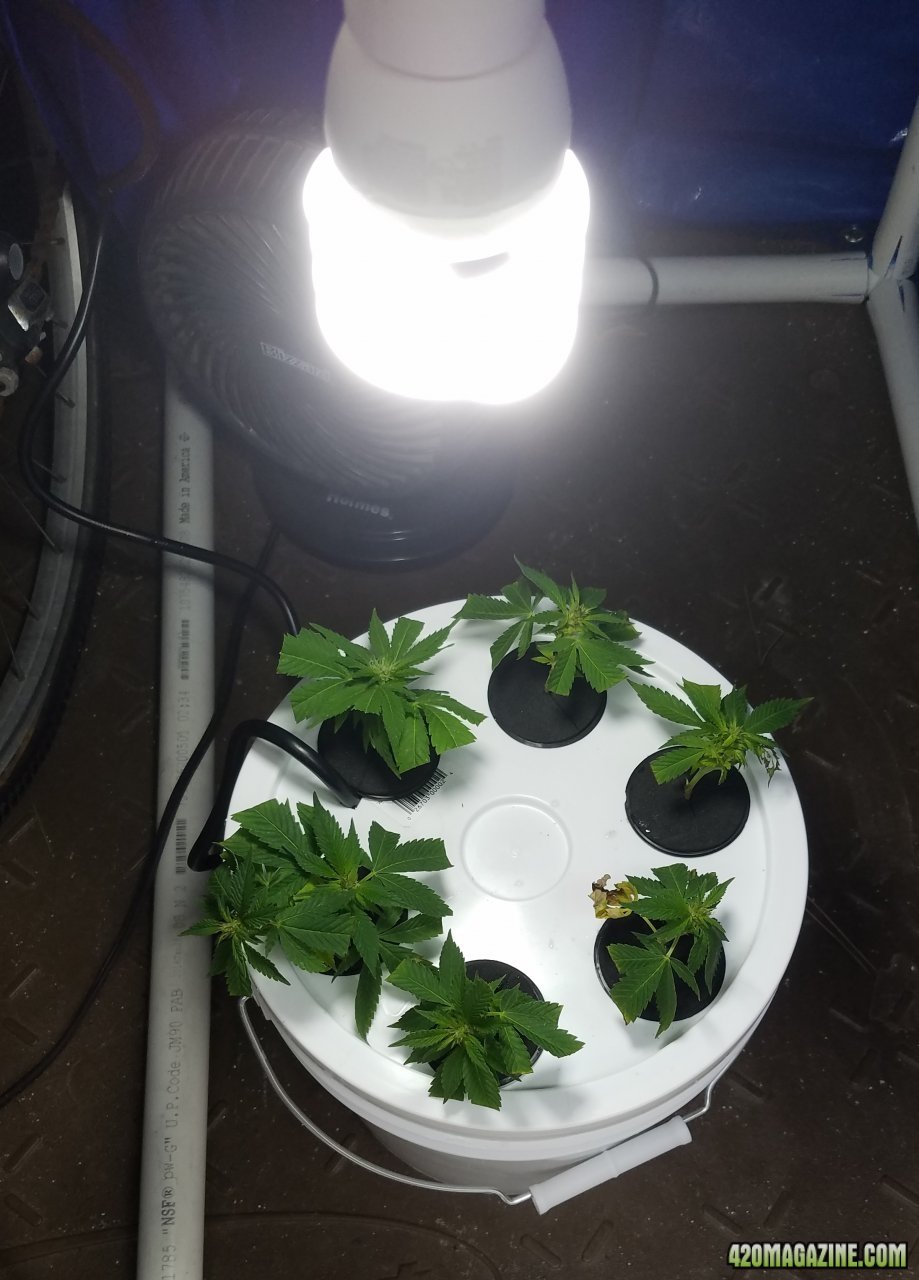
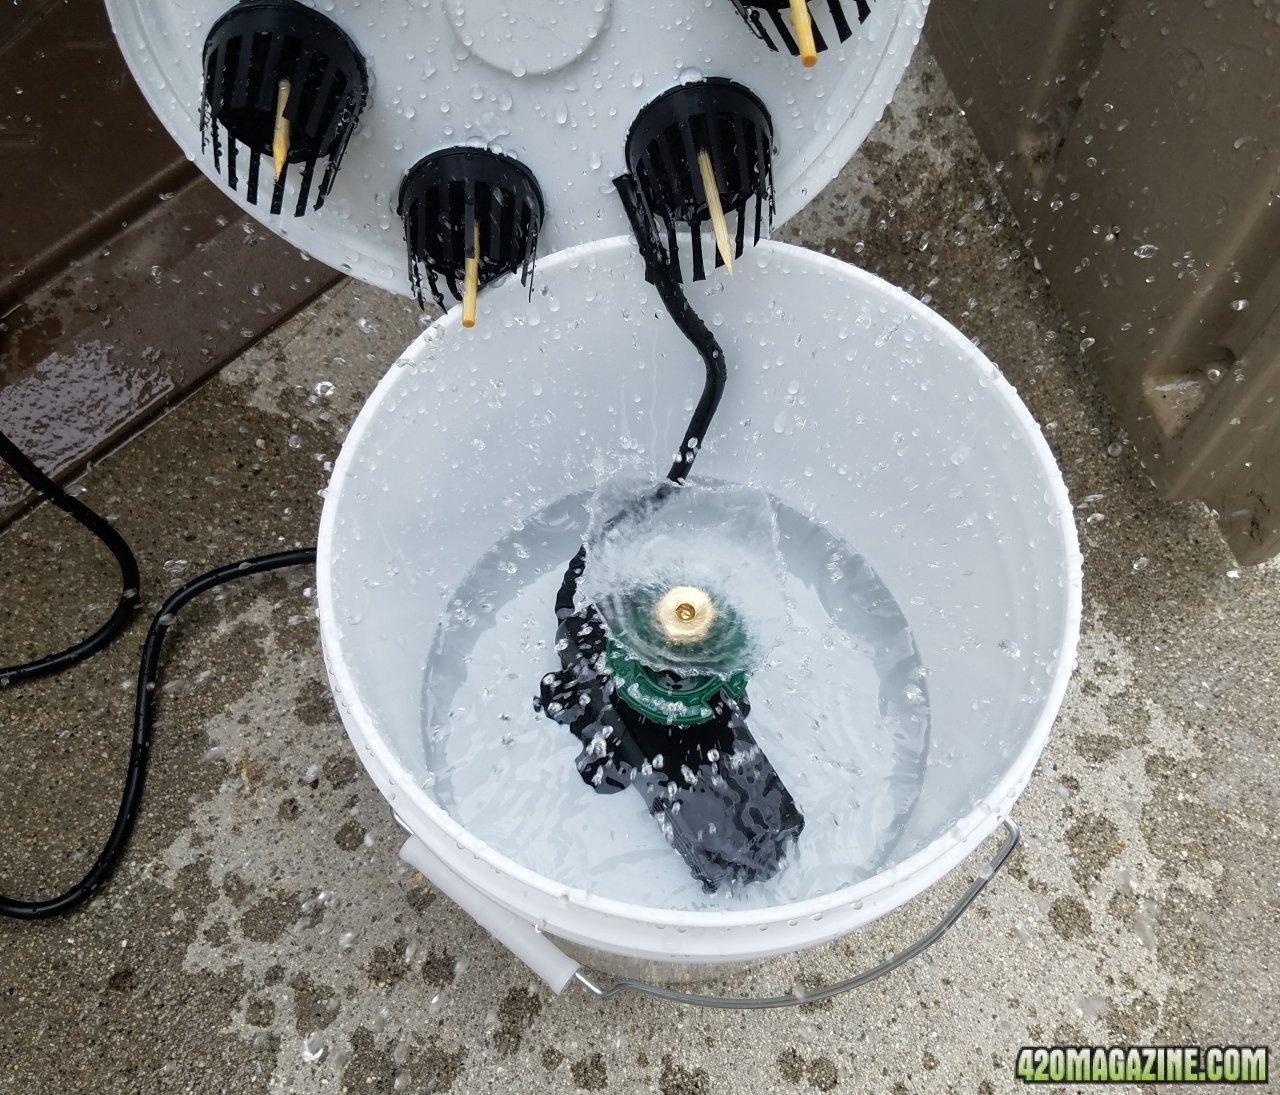
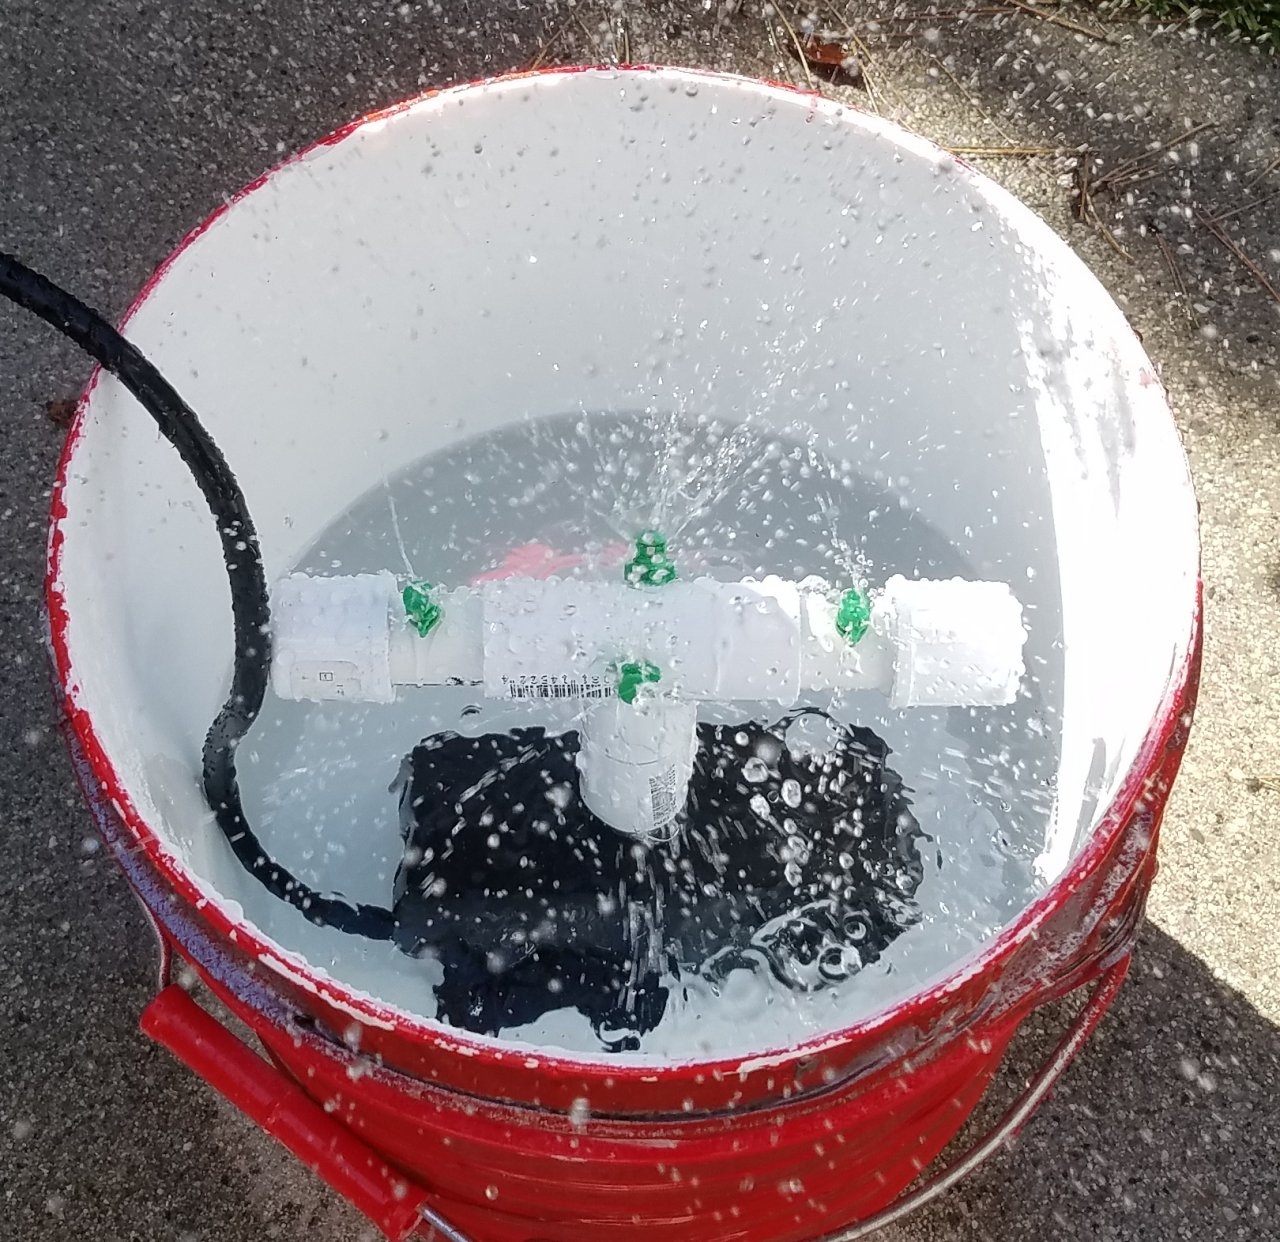
And that's the original! Since I built it I changed the sprinkler system twice, and now I'm using micro-sprayers in PVC:
I also wrapped the bucket in duct tape and spray painted it (red was all I had) to make it more light proof. Did the lid as well.
And now that the weather is cooler I'm having pretty good success. Certainly better than my previous attempts

How to build my cloninator aeroponic cloning bucket! This is the original but I've made a few modifications since then. I'll put those at the end in case you'd like to try them.
I started with a 2 gallon bucket and lid from Home Depot. I got this pump from Amazon:
Which came with these adapters:
None of which will connect to the sprinkler head, so I had to buy these in brass at Home Depot because they don't carry PVC smaller than ½:
So when it was connected it looked like this:
Next I centered the pump in the bucket:
And laid out the 2" baskets from Amazon (they came with the inserts):
Hole drilling was next. Here is a tip I got from youtube...after you drill the center pilot hole, run the hole saw backward and it makes a much cleaner cut. Here are the cuts and a notch for the wire:
Baskets inserted with the bottoms cut off. It should keep the roots from getting tangled:
Finished bucket with the neoprene inserts:
I used barbecue skewers to test the spray:
Maximum wetness! I filled the bucket about ¼ full (so around 64 ounces) and added 4 ounce H2O2 since I don't want to buy any z7 etc:
I needed a timer that would do short intervals, so I got this one and set it for 1 minute on / 15 minutes off. I may make that interval longer after a couple of days. Setting the timer was a lot easier than some of the reviews mentioned on Amazon:
I hung a single 23w 6500K CFL over the bucket:
And that's the original! Since I built it I changed the sprinkler system twice, and now I'm using micro-sprayers in PVC:
I also wrapped the bucket in duct tape and spray painted it (red was all I had) to make it more light proof. Did the lid as well.
And now that the weather is cooler I'm having pretty good success. Certainly better than my previous attempts
Nice, thanks. I have everything coming but the pvc pipe. Do fill to just below the horizontal pvc?I just drilled whatever hole was mentioned for that size sprayer when I got them from Amazon. They screwed into the PVC just fine!
Yes, as Norcaliwood mentioned to be when I was building this, more water offers more thermal stability.Nice, thanks. I have everything coming but the pvc pipe. Do fill to just below the horizontal pvc?
Didn't think of that. Pump's in water warming it up when it's on. Nice!Yes, as Norcaliwood mentioned to be when I was building this, more water offers more thermal stability.
That's why I run mine 15/1. When it was always on the water got too warm.Didn't think of that. Pump's in water warming it up when it's on. Nice!
I like that it runs for only 4 minutes an hour.That's why I run mine 15/1. When it was always on the water got too warm.